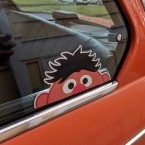
Welcome home Ernie!
With the state of the world right now I've been needing to hear some good news.
I got some last night when Patrick @midnightmotorsport let me know that he was finished and that Ernie was ready for pick up. Needless to say, I dropped everything I was doing (nothing) and headed right over!
At this point, we're 99% done with Phase 1 of the restoration. I'm just waiting on a couple of things that I'll mention in a moment.
Welcome back home buddy. I've missed you.
Here's the sunroof, headliner, and other interior components like the center console. I previously had a long console but preferred the shorty version. This required finding an early model tranny tunnel and cutting out the shift boot flange and welding it into place here. Patrick also made custom speaker mounts in the kick panels. The classic Becker radio works perfectly and drives 4 interior speakers via an amp installed under the rear bench. This thing rocks.
We removed the TEP rear tower brace and I had the holes welded closed during body and paint. Patrick made a new battery tray instead. I also made trunk side boards to match the floor boards I made earlier. Note the custom fuel filler and the automatic trunk opener that Patrick had installed for the PO.
Here's the final shelf parcel shelf (x2 Colin ?) and the trim pieces for the 3pt shoulder belts. Really happy with the factory look on these.
And here's the high mount 3rd brake light and upgraded rear LED lights. These should be a mandatory safely upgrade for any roundie owner.
Just a couple of outstanding items left in Phase 1:
I'm still waiting on my new seats to come in from the manufacturer. I received a used interior as trade when I sold my previous Flo-fit interior that I'm using for now. I'll make another post when we install the final interior.
We also ran into problems mounting the brackets I bought for the Marchal driving lights. Looks like Patrick will need to fabricate something to make everything work correctly. I'll keep y'all posted.
Last, I think I mentioned this before, but one of my goals with this build was to try and support the individuals, vendors and suppliers that provide parts and services for the 02 community. Many, many heart felt thanks to each of the following:
@midnightmotorsport Patrick, Colin, Andre, and the new kid Brandon, for all the hard work, expert craftsmanship, endlessly ribbing me, and your friendship. I truly cannot thank you guys enough.
https://americanautopaintingandbody.com/, Junior and the boys at American Auto for paint and body work.
@m-tuner for the nose clip
@Forrest_KoogleWerks for the duck bill air dam
@BLUNT for the SS trim and bumpers, tail light lenses and roundel emblems, plus a bunch of other build parts (like the LED tail lights) that Patrick bought directly.
@esty for the carpet kit
@Vintage-Autobahn for the all the misc. seals, shorty center console, shift boot flange, and rear bench core
@bluedevils for the rear seat belts
@halboyles for the 3rd brake light. Hal, thanks for making right on the 3d surround. You're a stand-up guy.
@danco_ for the Italian turn signals
@bimbill for trading side view mirrors and the friendship and support
@AceAndrew for the rear licence plate light covers that I didn't end up using but sold to Patrick
@Ireland Engineering for the header
@MoBrighta for the H4 headlights with the city lights
https://www.wallothnesch.com/en/ for the replacement floorboards and spare tire wheel well sheet metal
I hope I didn't forget anyone. But if I did, sorry and thanks for your help regardless.
Cheers, James
P.S. Still reading? Here's a sneakpeek at Phase 2:
-
 5
5


9 Comments
Recommended Comments
Create an account or sign in to comment
You need to be a member in order to leave a comment
Create an account
Sign up for a new account in our community. It's easy!
Register a new accountSign in
Already have an account? Sign in here.
Sign In Now