
Sunroof Dome Light Panel Rebuild

Entry posted by bergie33 in Restoration
880 views
As is very common, the dome light panel that attaches to the roof behind the sunroof opening (in a sunroof car, obviously) was warped, swollen and crusty. I had some 1/8" melamine/whiteboard material, so I thought why not?
Luckily mine was in decent enough shape to use as a template. Cut it out, marked the appropriate holes for the panel clips, headliner rod brackets, the dome light and the wiring clips. After I got all of the holes drilled and cleaned up, I applied some urethane varnish to the unfinished brown side to help prevent future swelling and deforming. I paid extra attention to the insides of the holes, where water would be likely to do more damage. I recommend drilling slowly, and clamping a backing board to prevent the holes from getting too deformed from the drill bit punching through.
Here are the pics of the process, with lots of measurements and notes handwritten in scraps of paper on the panel as I went. It's kinda pretty, for a part that will never again see the light of day. Hopefully someone, someday will find this useful.
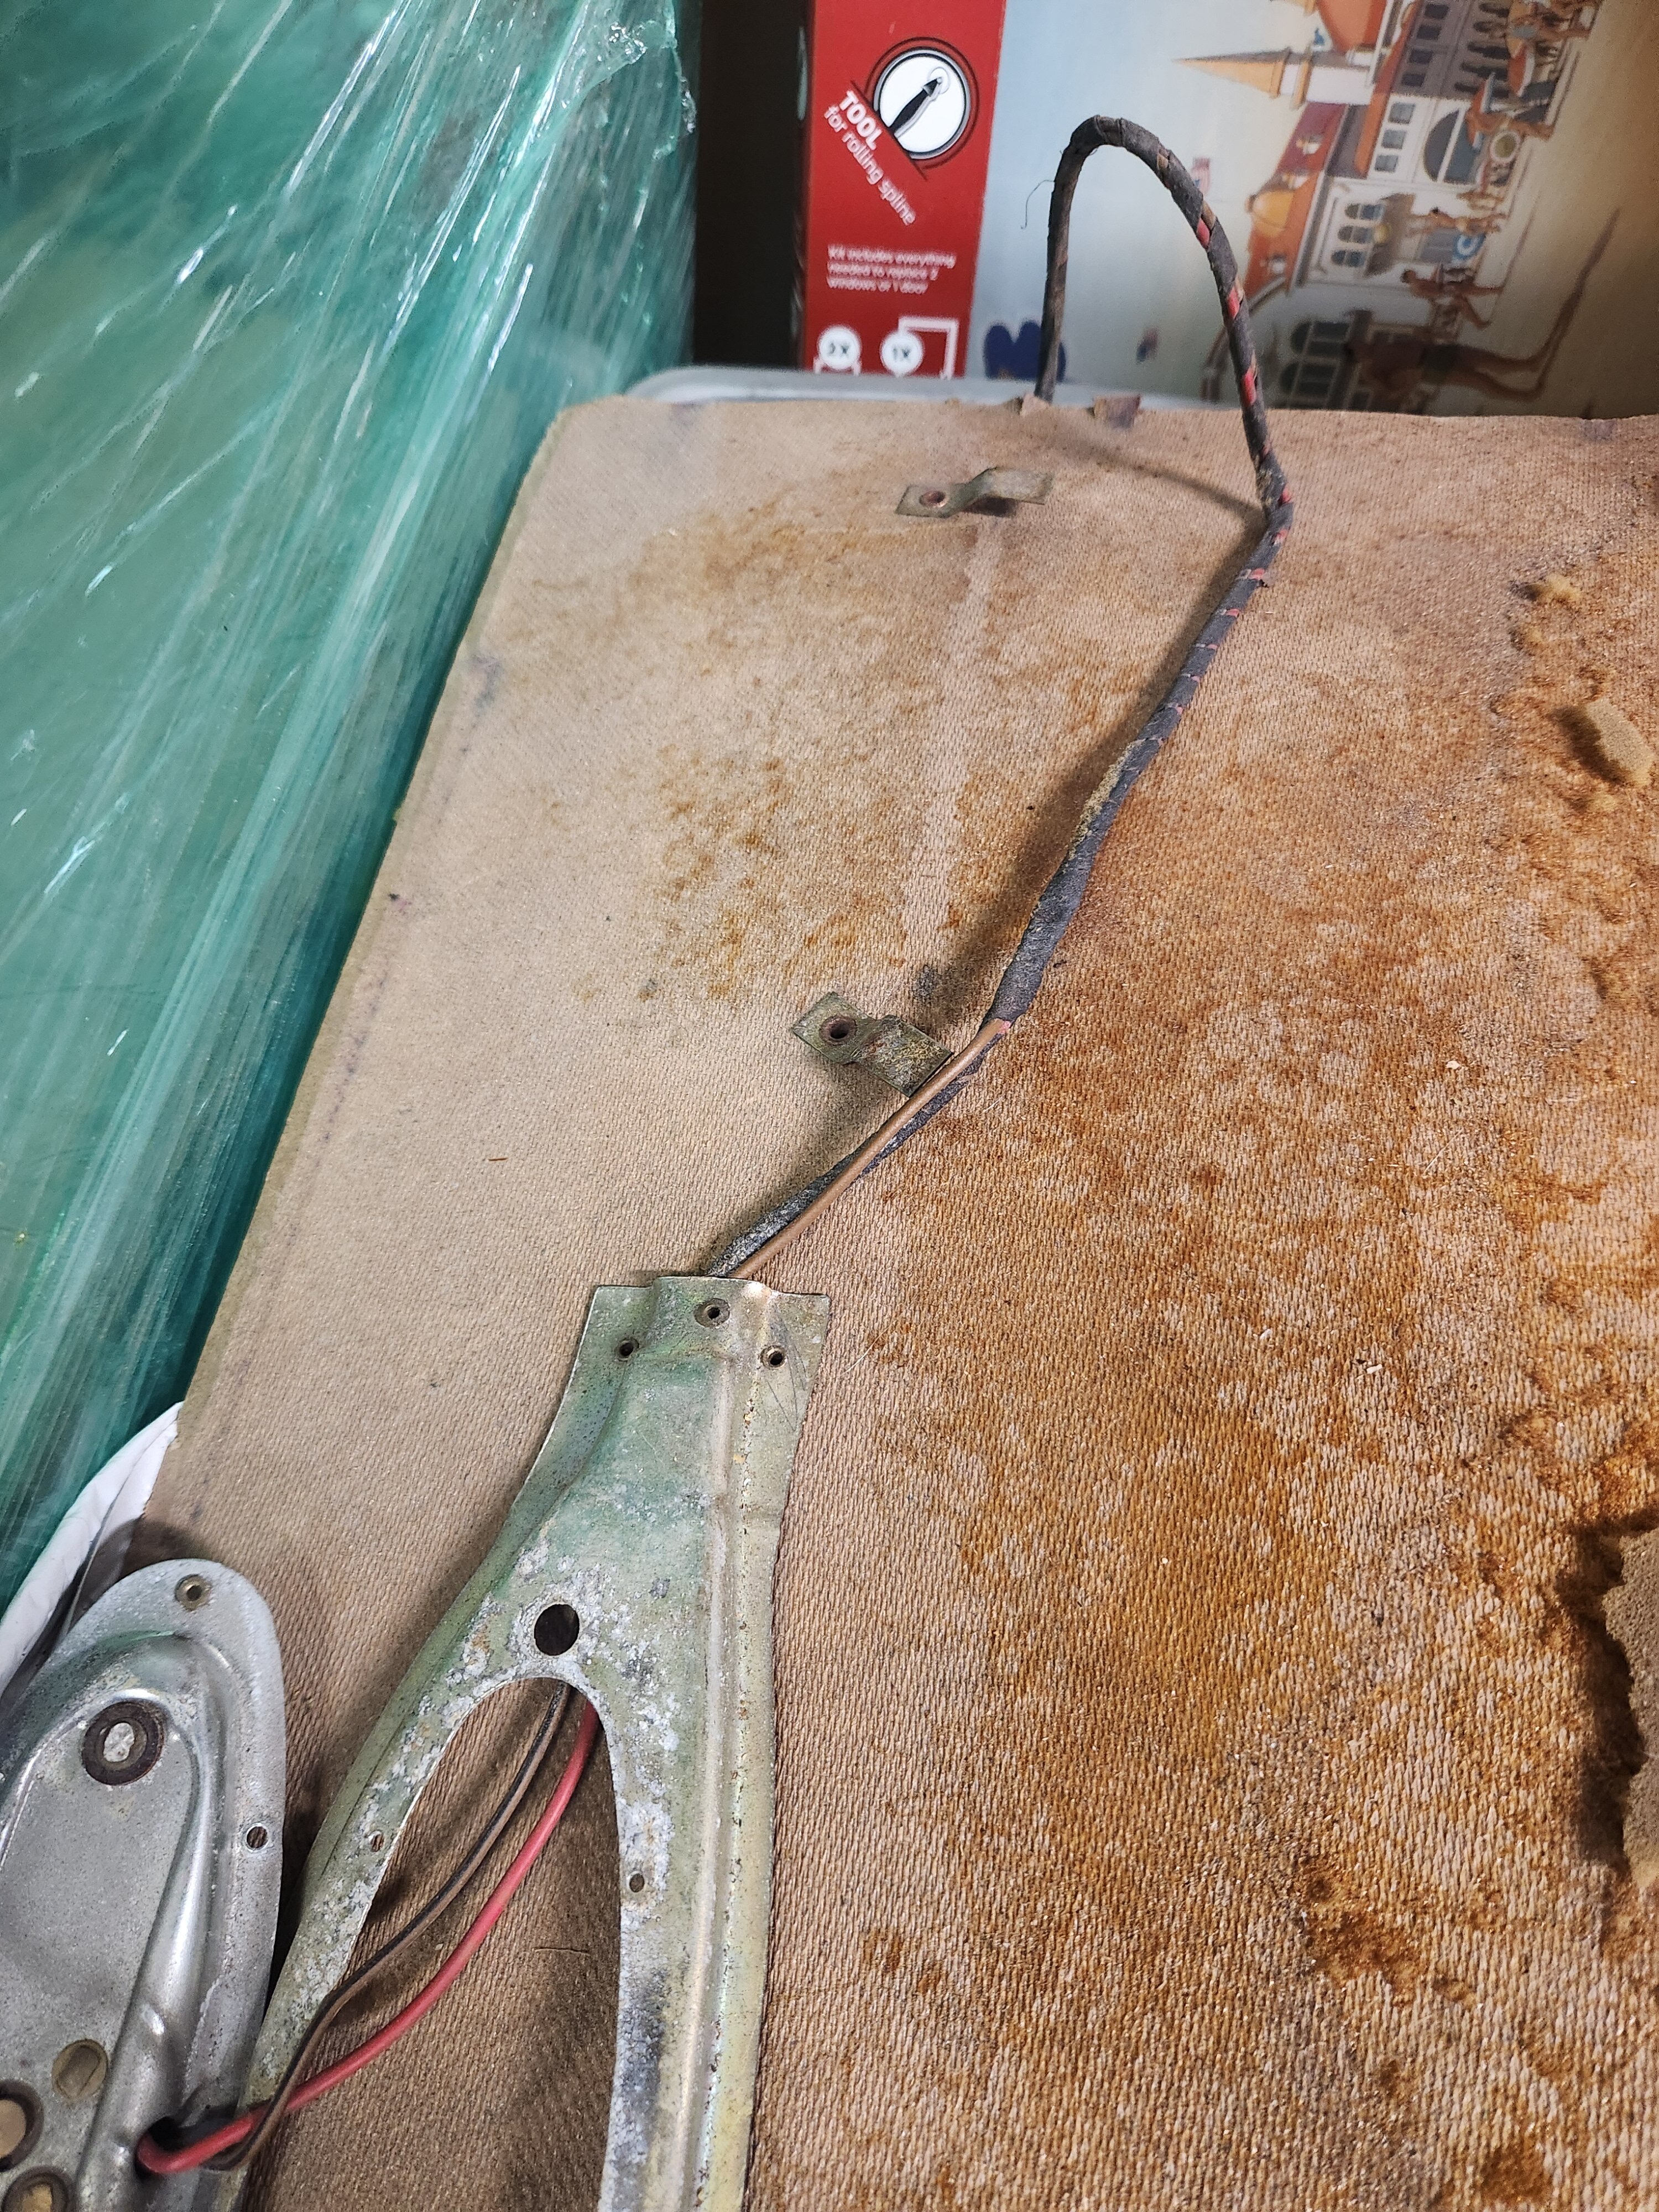
Old crusty board pics. There is foam attached to it, I just don't have the foam yet.


The new board, after drilling:


Here are the measurements and locations of the holes (all hole measurements are on-center, not to the edge of the holes):
Total size of the panel is 32" x 17-3/4"

Drill Bit Measurements:

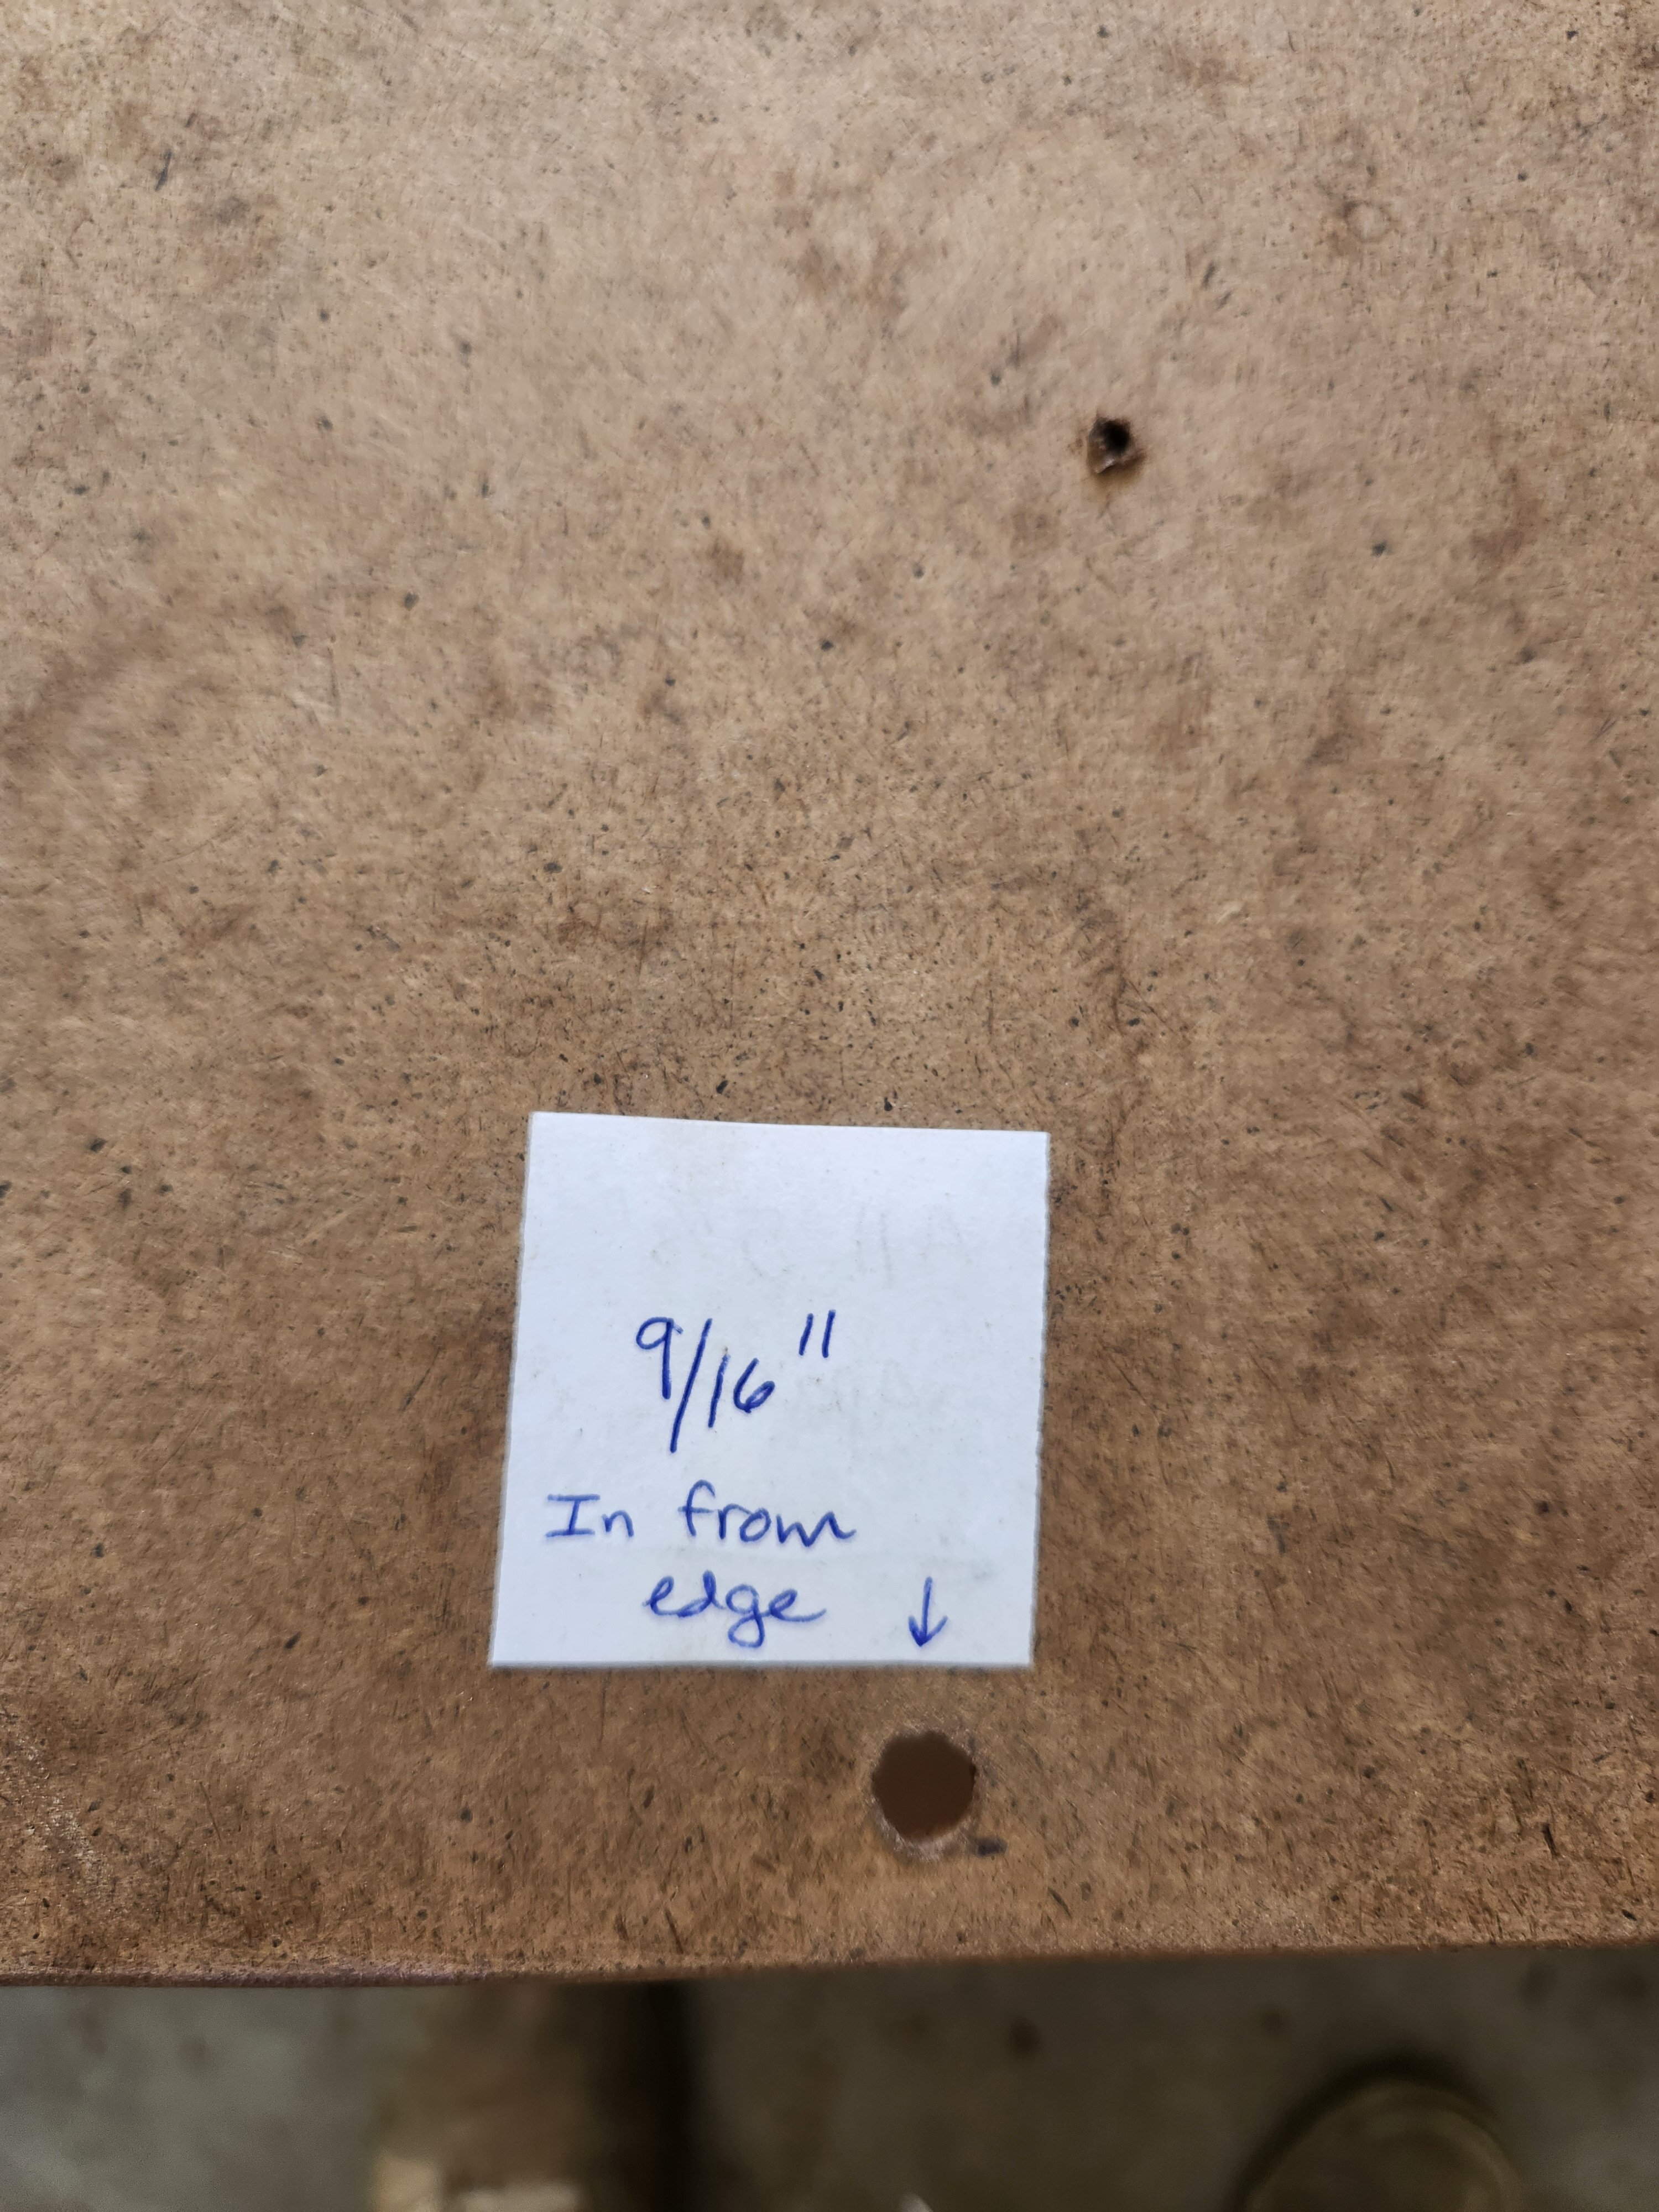
Holes along the rear edge for the panel clips (that clip into the roof) are 9/16" in from the rear (long) edge, and are spaced 5-7/8" apart.

Holes to rivet in the clips that hold the straight headliner rod are 5-1/8" in from the rear (long) edge. The first one is 2" in from each of the sides and the other two in the middle are evenly spaced. Spacing left to right probably isn't critical since these clips are just holding a rod.


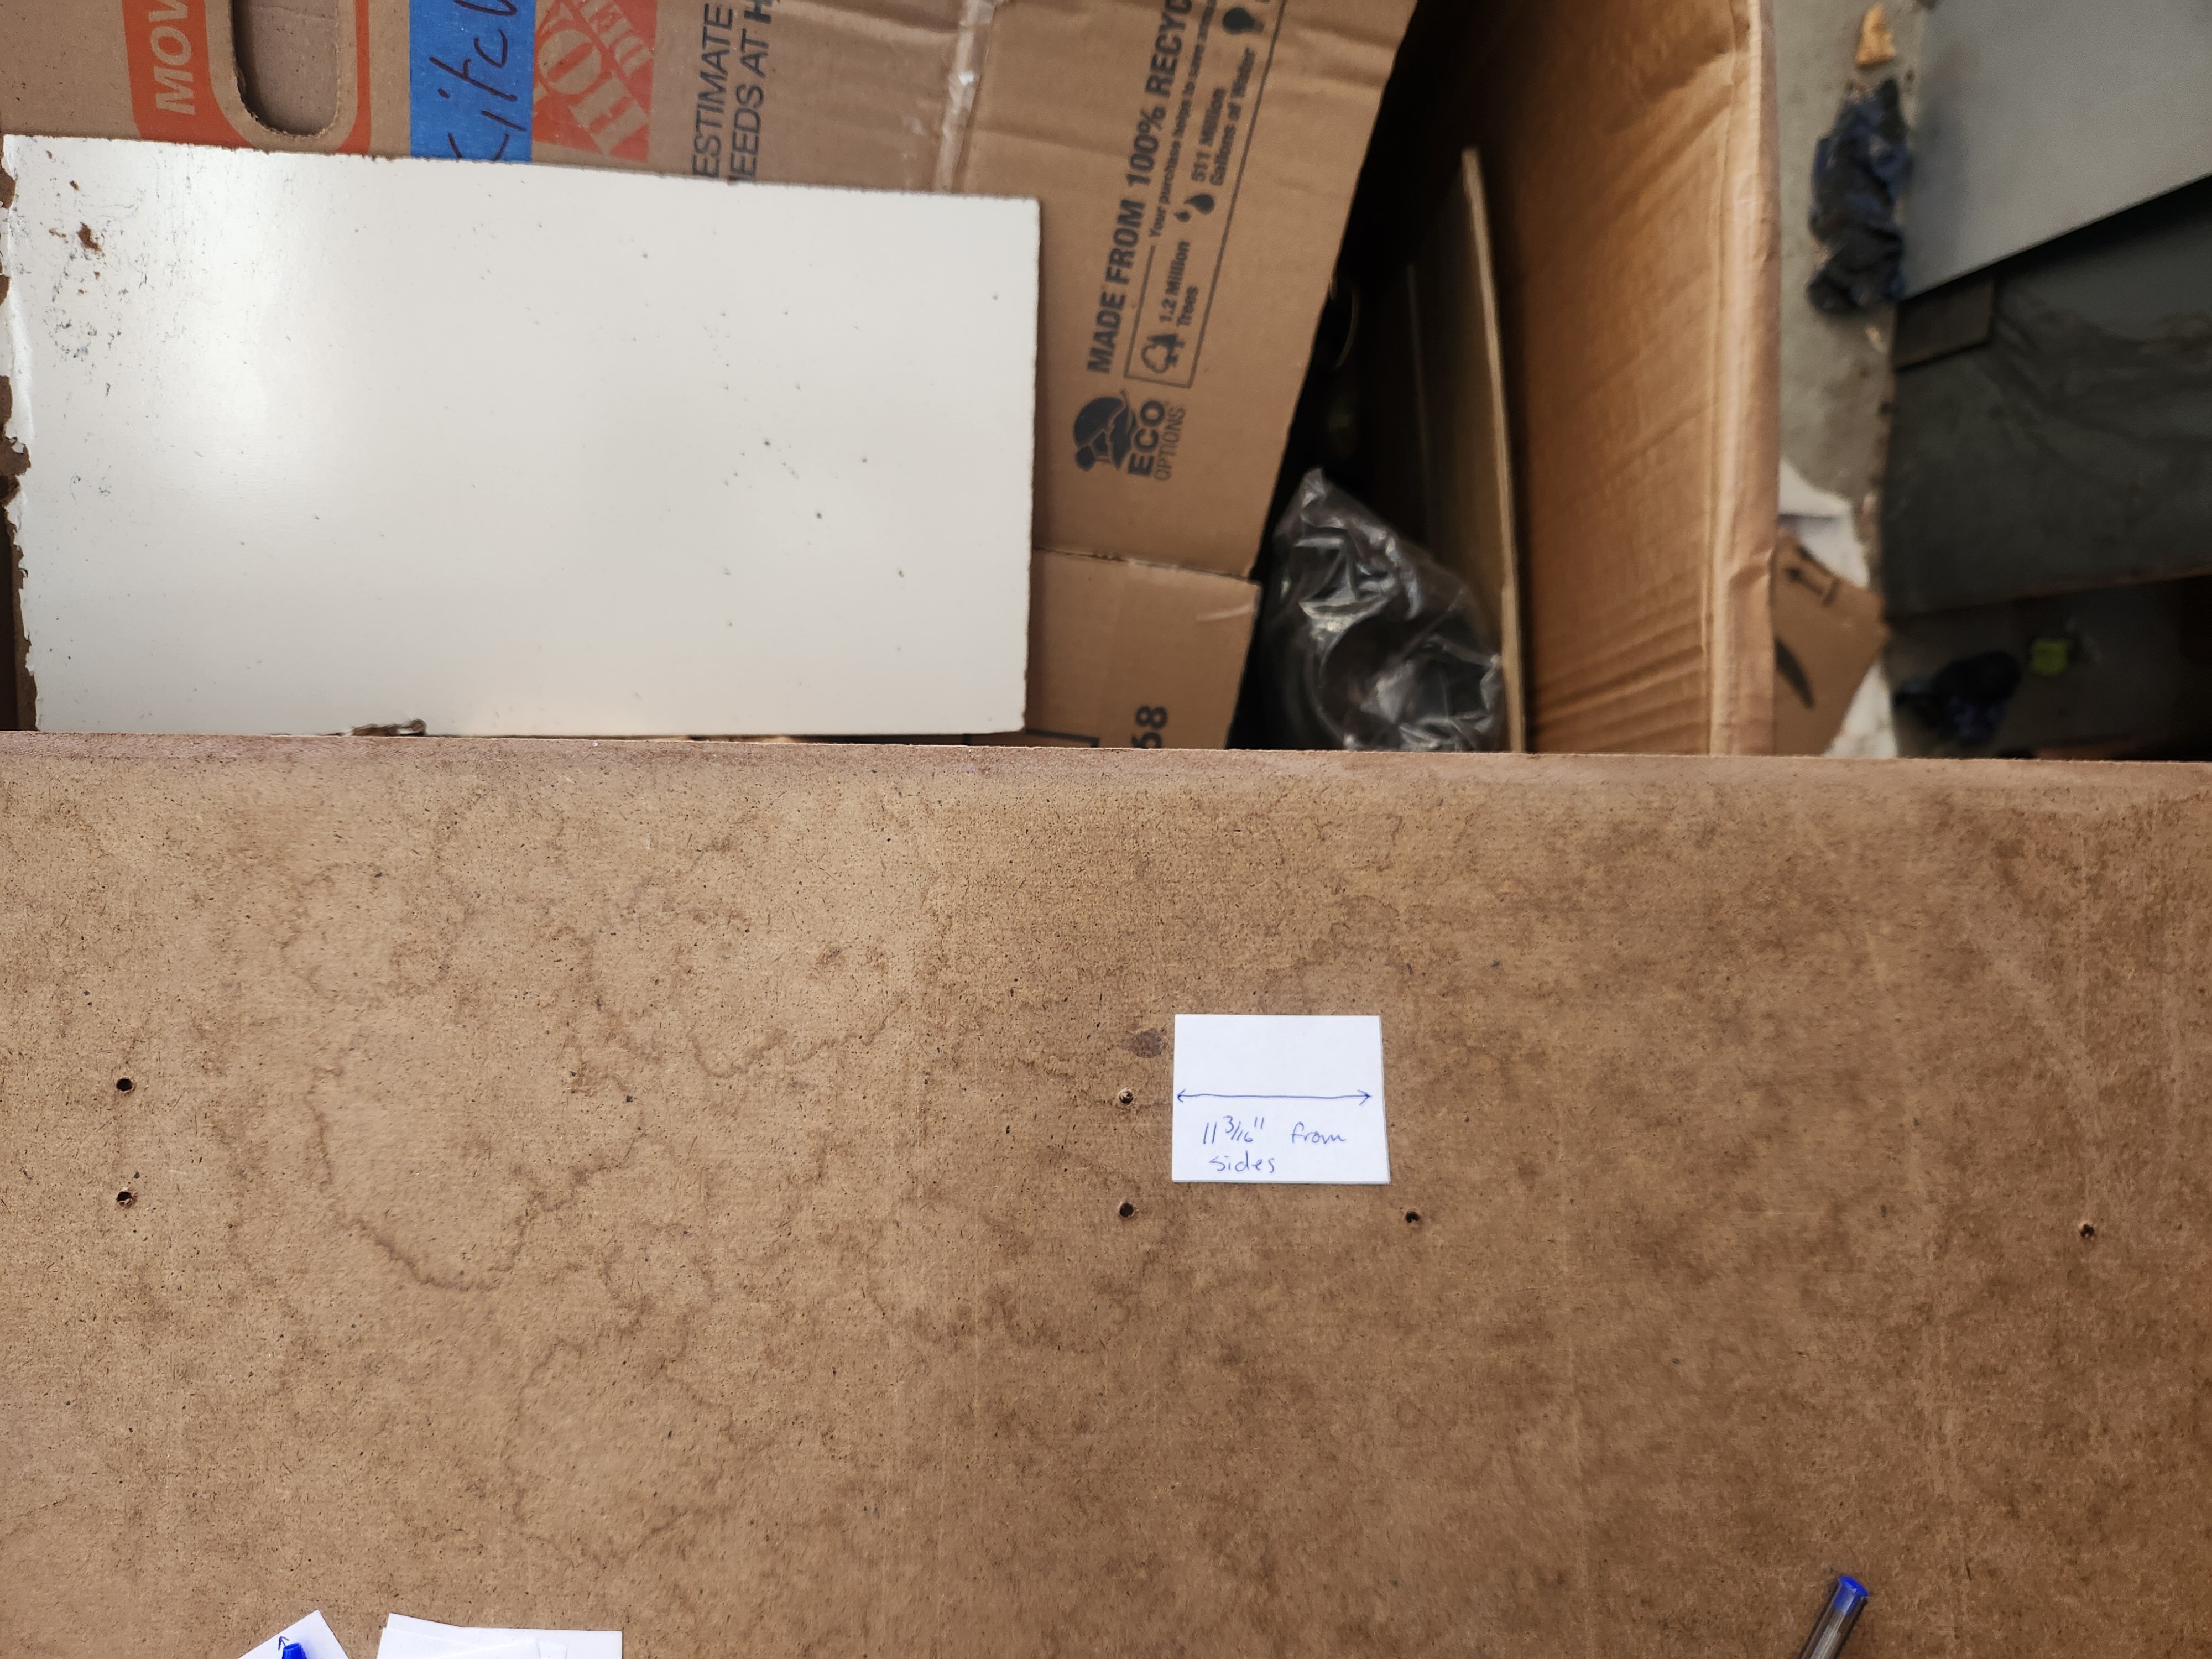
For the rivet holes that attach the dome light, they are located 11-3/16" from either side and 3-7/16" from the front (long) edge.


The holes for the rivets attaching the brackets for the dome light wiring are both in line with the rear holes of the dome light. The left to right spacing of these doesn't really matter. To be more correct though, the first bracket should be positioned far enough away from the dome light to attach to the bend in the wiring, the other bracket location should be closer to the edge of the panel. Use your dome light and wiring as a guide.


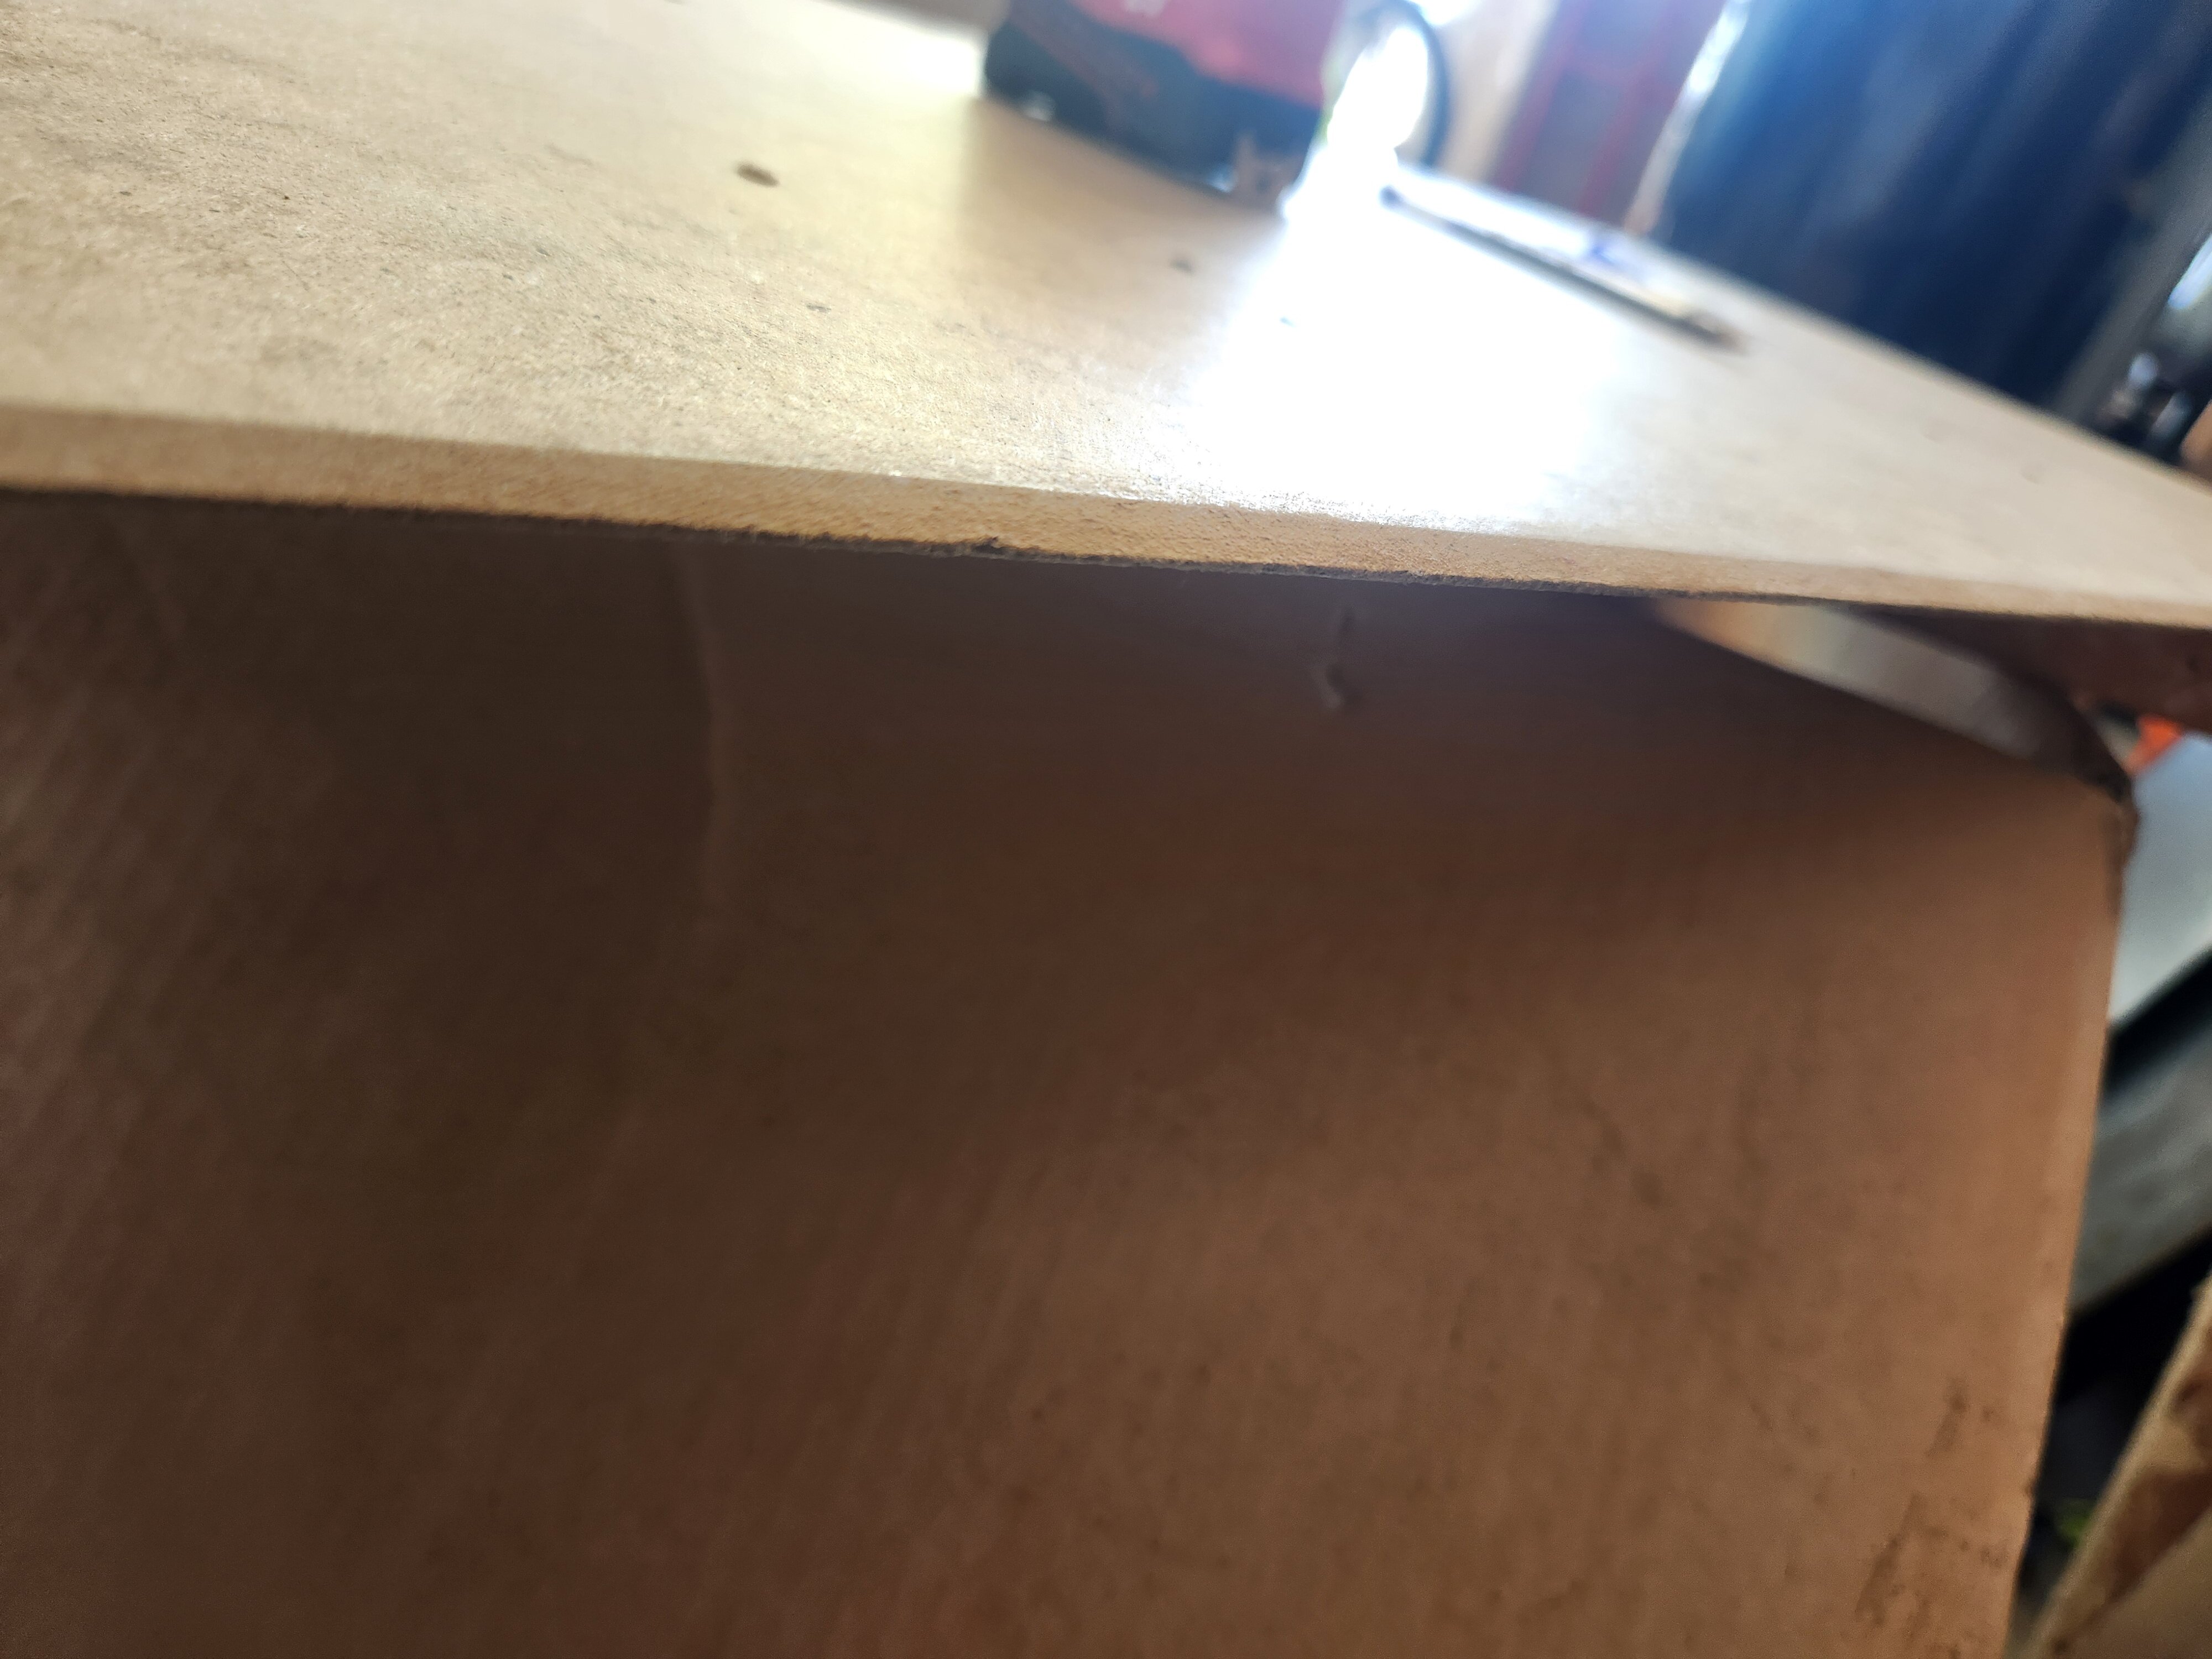
Once all the holes are drilled, you need to file down the front long edge of the panel. The panel slides into a very narrow slot bracket on the roof, just behind the sunroof opening, and it is tapered. Filing the front edge of the panel should mimic this taper. I filed a bit, then test fit it, then filed a bit more, then test fit, until I got it to seat far enough forward for the rear panel clip holes to line up with the respective holes in the underside of the roof. I used a fine metal file and it went very quickly. This might take a little longer if you decide to use plywood. If you notice in the last of the 3 pictures below, you need to get it filed down to pretty much a fine point.


Application of the polyurethane varnish. I think I applied 3 coats.


Installing the dome light:


Finished product. I haven't installed the plastic trim clips or the foam yet. I am not ready to use the panel for a while still and didn't want the clips or the foam to get buggered up, so I will install those right before the panel goes into the car.


-
 2
2

0 Comments
Recommended Comments
There are no comments to display.
Create an account or sign in to comment
You need to be a member in order to leave a comment
Create an account
Sign up for a new account in our community. It's easy!
Register a new accountSign in
Already have an account? Sign in here.
Sign In Now